Let’s Take a Trip to Visit a Gorgeous Outdoor Gas Fireplace
Hello all you DIY’ers and welcome to this edition of, “That Awesome DIY Fireplace” where we introduce a DIY homeowner, tell you what state they reside in, and show you how awesome they were at building their own outdoor fireplace. We’re going to see a stunning outdoor gas fireplace in this article.
Introducing Our DIY Homeowner
We venture down the street and across the tracks from Backyard Flare headquarters to introduce homeowner Jim, who wanted a short in stature outdoor gas fireplace. Jim specifically wanted to burn natural gas. Jim was restricted to natural gas and a short finished height by his homeowner’s association due to his home’s location on the golf course. Jim’s backyard was on the 12th tee so there is quite a view.
Jim contacted Dan at Backyard Flare and explained his fireplace design and restrictions. No sweat at all for the Backyard Flare team. Dan did a couple site visits to Jim’s backyard and they came up with a plan of action. Dan was contracted to build the fireplace, but Jim was able to save a bit of money because he helped Dan through the process …and Jim learned a lot, very quickly. It’s always a blast when homeowners can help because they learn and have a great sense of accomplishment.
Getting the Area Prepped
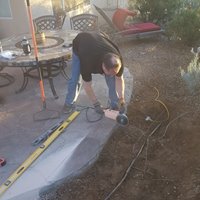
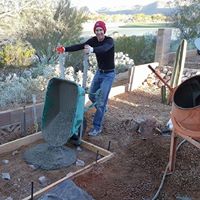
After the fireplace location and width was determined, a diamond blade was used to cut through the existing flagstone patio. This area was excavated and framed for the concrete slab with rebar inside the pour. An inexpensive Harbor Freight cement mixer was used which made this job relatively quick for two people.
Once the concrete cured for a couple days, Dan and Jim started laying block in a running bond (staggered) pattern.
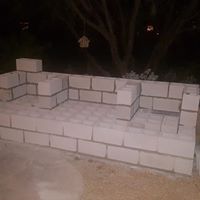
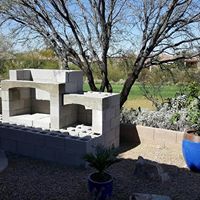
The firebox in the middle was sandwiched between two wood storage voids on either side. An electrical line was routed through the blocks to install a 110v outlet. This outlet was used to plug in a power transformer for the structure and backyard ground low voltage lighting.
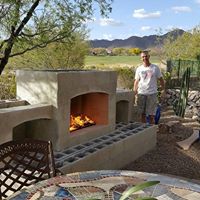
Lot’s of Finishing Options Were Added
When the structure block work was completed, firebrick was added to the inside of the firebox.
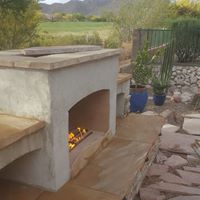
The natural gas line was plumbed up the backside of the structure and a shutoff valve was added inline before it was installed into the back wall of the firebox. This gas line stubbed out a few inches inside the lower right corner of the firebox. Gas tubing was added to an H pipe and a few test burns were done before anything was solidified.
The wire for the structure lighting was routed to the front of the hearth and to the inside of the storage voids, figuring out where each light would be located. The front face of the structure was adorned with a beautiful stacked stone, which was mortared in place. The remainder of the structure was covered in a smooth coat troweled stucco, which was later painted.
Natural Stone Added So Much
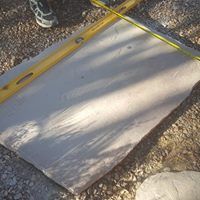
The horizontal surfaces were covered in a gorgeous light tan flagstone which Dan and Jim cut with a chisel method for a rougher edge. This was a bit time consuming and much slower than a saw cut front edge, but completely worth it in the end.
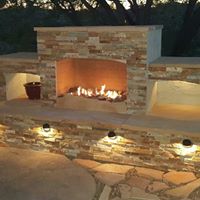
With the leftover flagstone, Jim extended the flagstone patio to the far-right side of the structure and filled the joints with matching mortar. After it was pressure washed, you can’t even tell where the old flagstone patio and the new came together. Totally amazing.
A vertical piece of flagstone was added to the front of the firebox after it was chiseled to resemble a mountain range in Jim’s home state of Colorado. This piece of stone helped contain the local river rock that was added to the top of the H pipe. This rock completely hid the pipe, making it look as if the flames “originated” from the rocks.
Tying the Structure to the House Decor
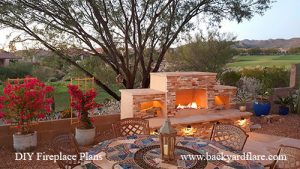
For continuity in the backyard, the fireplace stucco was painted to match the house. New outdoor furniture was added to the patio and many nights have been spent eating, drinking, partying, and relaxing in the backyard. So many golfers stopped to see the fireplace and to offer kind words, complementing Jim on his design.
With the ambiance of the lighting in the voids and quick start of the natural gas in the firebox, Jim and his wife have been able to say, “hey want to have a fire?”, and enjoy it in a matter of seconds. Easy on and easy off is what Jim wanted and it turned out great.
You Ready to Build One?
We sure hope you like it too, so let us know how this DIY fireplace inspired you? Are you ready to build your masterpiece like Jim did? Even though this outdoor gas fireplace included natural gas, low voltage lighting, and chiseled flagstone, it can all be done by you too. If you have the DIY mindset, we can help you achieve greatness. We have assisted hundreds of homeowners who are weekend DIY’ers, realize their potential to build fireplaces just like Jim’s. You can do it too. Visit Backyard Flare for more information and DIY construction plans.
Thanks so much for reading about another great DIY outdoor gas fireplace build. We’ll bring you more soon, and as always …happy building.
