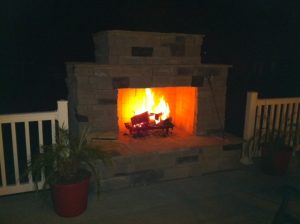
DIY Outdoor Fireplace Inspiration
Each week we are going to pick a Backyard Flare designed fireplace built by a DIY homeowner enthusiast. We will then give you a DIY outdoor fireplace build review to dissect it regarding the construction and finish work. We hope you are inspired and that you realize that you too can complete this type of backyard project.
DIY fireplace building is achievable for even the average homeowner and the materials are readily available at retailers in your area. The knowledge of how to “put it all together” is accessible if you know where to look. Some of these amazing structures look as if they should only belong at a fine 5-star resort, but that’s not so.
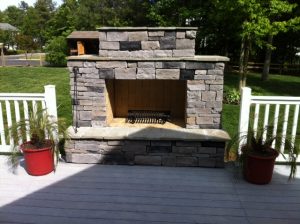
Our featured fireplace, built by Gene, is located in the great state of Maryland. Gene approached Backyard Flare with a design idea and fireplace concept that became known as the Prescott Fireplace. Gene wanted his fireplace to be raised to the level of his deck, which was approximately 3 feet. A wide firebox and matching wide chimney was desired.
Prepping the Space for Construction
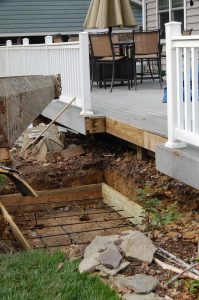
After getting the construction plans, Gene started building. He first cut a section of the railing and deck out so the fireplace could be built into the deck. This would make it appear that the deck surrounded the base of the fireplace. Gene then excavated a bit of ground just outside the perimeter of his deck posts. Height concerns were taken into consideration while pouring the foundation slab so the mortared blocks would reach the level of the deck perfectly. At no time was the fireplace structure to support the deck or come in contact with it.
Gene made sure to use rebar in a grid pattern to pour his needed thickness of concrete taking into consideration factors such as frost line, ground prep, runoff, soil type, and undermining. This will be different for different geographical areas.
Premixed concrete brought in on a trailer was used to pour the slab resulting in a beautiful foundation. Not much finishing needed to be done because the block work would be covering the newly poured pavement.
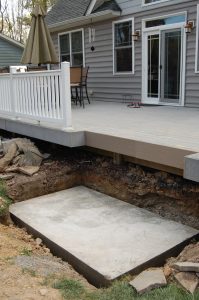
Work was done on the edge of the deck to perfect it. The gaps around the slab would ultimately be filled in with dirt once the first few rows of block were mortared in place.
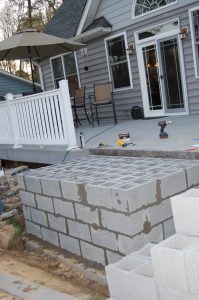
With the block work started, Gene quickly built upward until he reached the height of the deck. The structure was set back a couple inches so the veneer could be applied down the front face of the fireplace.
Time to Finish the Fireplace
Once the structure was completed in rough form with the appropriate chimney measurements and dimensions, the finish work was planned. Lots of possibilities were posed and a few were chosen.
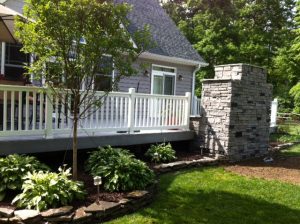
The structure’s vertical surfaces were covered in a beautiful faux veneer which looked great with the accented dark pieces. The horizontal surfaces were covered with a thin earth tone colored flagstone that worked well with the color of the veneer. Mortar was used between these stone pieces thus giving it a nice finished look.
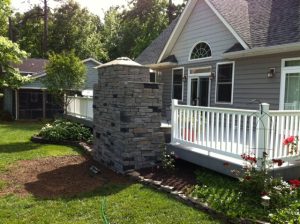
Landscape was completed around the finished structure which gave this space an amazing final look. An elevated fire grate was added to the firebox and fireplace tools were bought to manage the fire. Gene did a great job on his outdoor fireplace and made us here at Backyard Flare, LLC very proud.
We’re hoping this DIY outdoor fireplace build review inspired you and that you consider this type of outdoor project. Visit us at www.backyardflare.com if you would like to build your own outdoor fireplace and would like more information about how it’s done.
